


The end of January means that Valentine's Day is just around the corner. And Valentine's Day always means roses to me. I've been wanting to craft some paper roses for my home, "shabby chic" style, and found my inspiration from Cassie Chappell's roses in a Martha Stewart episode -- http://www.marthastewart.com/article/paper-roses -- and this fabulous blog post --http://frenchcupboard.blogspot.com/2010/07/parisian-inspired-rosette-tutorial.html. I combined their ideas to craft my own quirky style of paper rose.
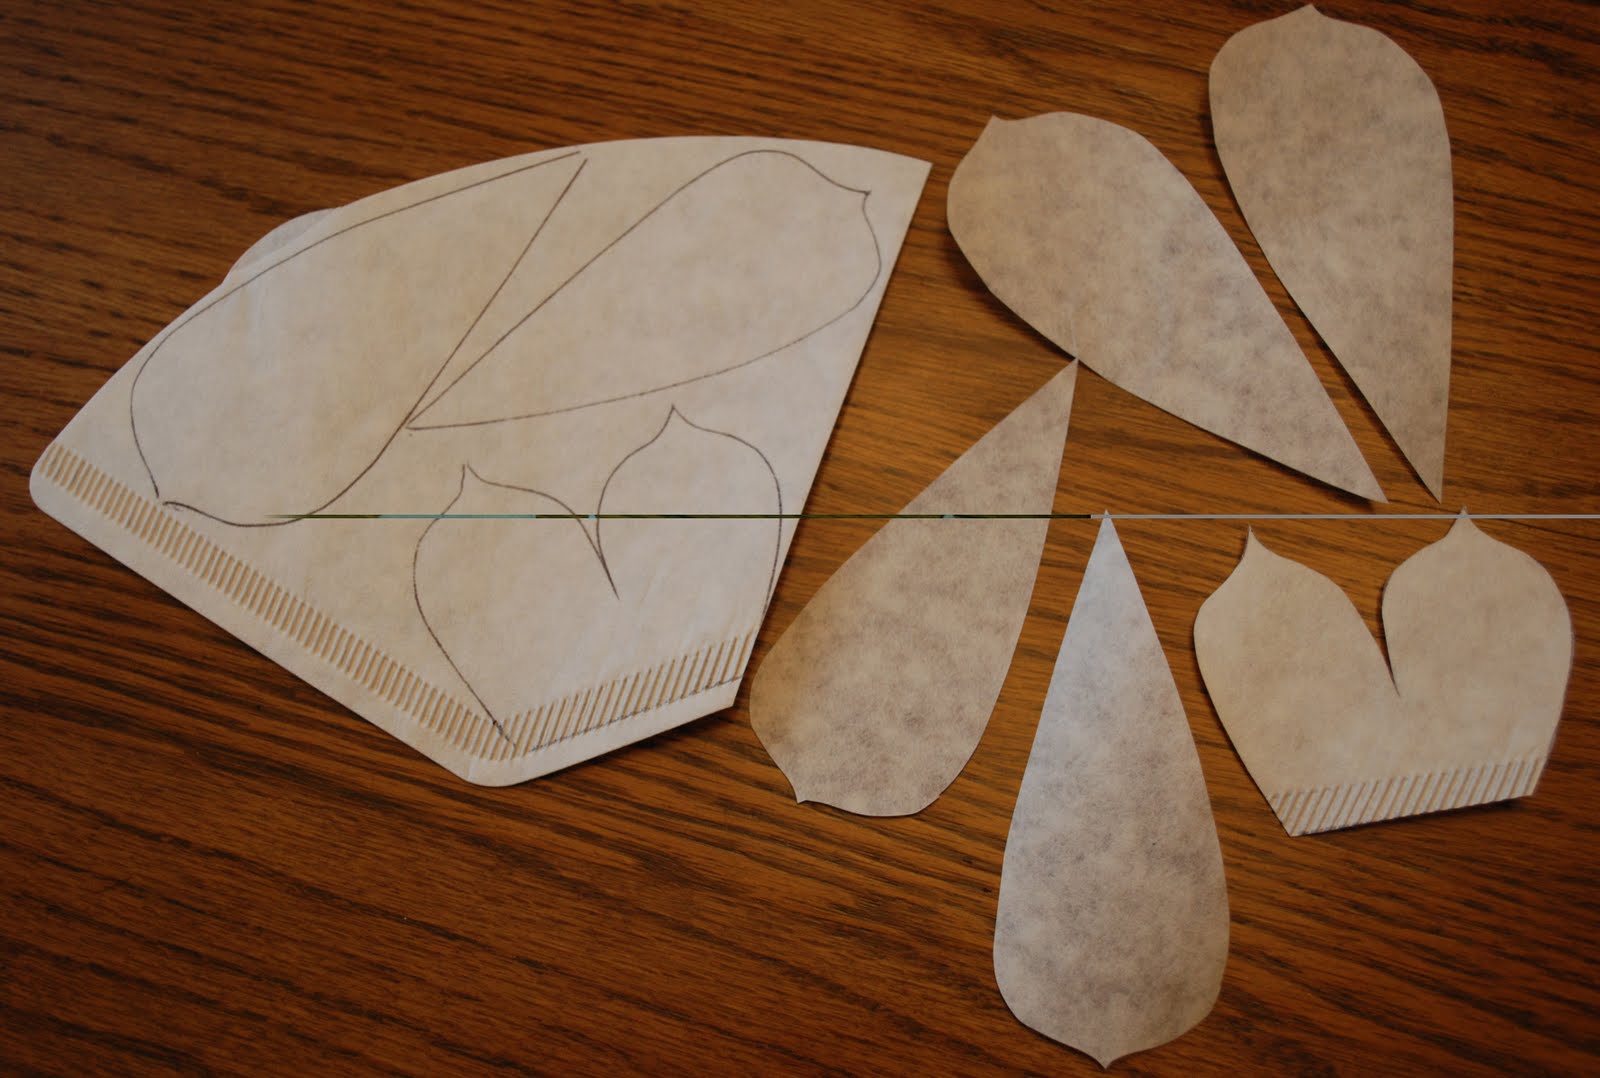
Believe it or not, these start with plain ol' cone-shaped paper coffee filters. Using the templates provided on marthastewart.com, I traced and cut petals and leaves from the coffee filters.
Then I took inspiration from The French Cupboard blog mentioned above, and stamped images on the petals.

I added color with very thin watercolor paints:

and immediately realized that some of my stamp ink was not waterproof!

Well, let's see what happens anyway. I'm painting on the smooth side of a glass cutting board, so the paint will pool

and I really saturated the petals with color:

Then I set the petals on absorbent paper to dry:

and found that I really like that some of the inks ran!

These look a bit like petals cut from an old, water-damaged love letter.


When the petals were mostly dry, I spattered them with more paint.

After all of the petals were dry, I assembled the rose, shown here in lop-sided, imperfect glory. (Be kind -- this was my first attempt!)
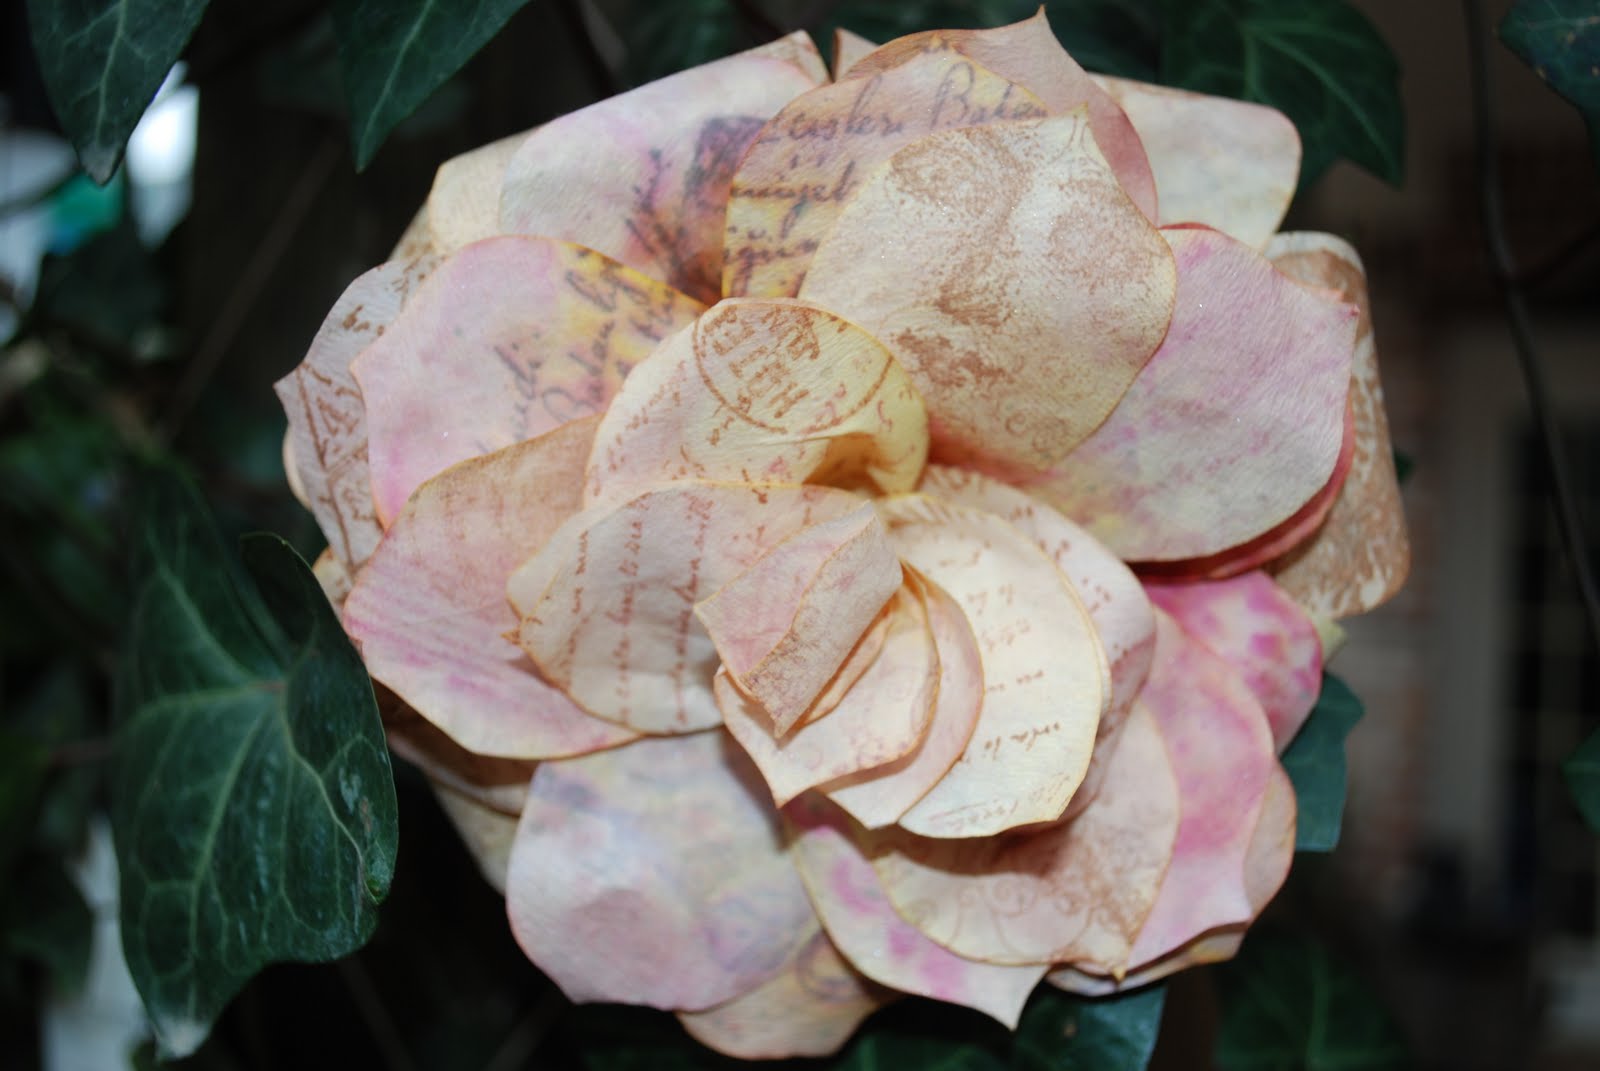
I like the way some of the stamped details peek out on the petals -- a face; a hotel stamp; indecipherable words:

I won't belabor the details, but you can get the instructions and see a video on the Martha Stewart website. I did learn a few tricks, though: Double-stick tape is my friend, and floral tape is not! Wrap 26 gauge florist's wire around the rose while assembling, and it will stay together while fluffing the petals.

I think I need to make about 5 more to fill this cute container which started the whole business. First, though, I'd better make a pot of chili -- Mr. Slipper Moon Studio's appetite is getting the better of his patience! Maybe he will even bring me real roses for Valentine's Day.
Those are great, I like the inks that ran too. I hope my friend Tom sees these. I have to make sure he looks.
ReplyDeleteI like how you painted the petals before assembly. I made some of the roses yesterday, but didn't paint them yet and was wondering how they would work out. Thanks for adding this. Yours came out very nice, btw!
ReplyDeleteFYI: Stais-on or Stays-on (can't remember) was recommended on a stamping blog for ink that won't bleed when colored over with water. :) Nice work.
ReplyDeleteThanks, Casandra! And thank you all for your very kind comments.
ReplyDeleteWow, beautiful! I love the way you paint the paper and then you stamp it. After you paint it and the ink runs I just can say, wow it become beautiful petals. Love your paper roses <3
ReplyDeleteI love the stamped look. I am making a few of these for my sons wedding. I have tried a simpler form already. You can take a peek here on my website. I will look for the ink that doesnt smear when wet.
ReplyDeleteJust took a look at your website -- LOVE the roses!
Delete